I loved the mirror project we did, the vessel sink in granite, even the shower curtain and rugs match pretty good. I lucked out on so much stuff. I got the shower curtain for $3.50 from the T.J. Maxx superstore in St. George on clearance. Such a deal! The light aqua rugs were on clearance too, I love that really fat loopy yarn look in rugs now, very 70ish....Every time we go t Tuacahn outdoor theatre in the summer we go visit the giant T.J. Maxx....well John walks the doggie while I go shop for a half hour...LOL
We had this $250.00 piece of granite we had purchased at The Tile Outlet in Draper just sitting around the garage for months. It was a 2nd that had a few little flaws and pocks in it. But we knew we could cut around those or fill them with silicone if we couldn't work around them. And we wanted to use it for both of the bathroom remodels.
We had to cut out sink and fixture holes in the granite so the flaws wouldn't be a problem. And it turned out to be the same granite type as our kitchen granite. I think it is called Santa Cecelia or something like that. It is a very popular creme with black and gold flecks in it. Anyway we asked Tile Outlet if they could cut and install the 2 bathrooms. So they worked on cutting them to our sink specifications while we went looking for vessel sinks.
 |
| I was kinda stuck with a blue tiolet and tub...but I kinda like em! |
I must admit that vessel sinks come in so many types and varieties I was on the internet for weeks trying to decide what I liked best. I have a blue tub and toilet in this guest bathroom that I kind of like. They are older but they are pretty and were custom when they remodeled the house right before we bought it 12 years ago. So I went back and forth deciding if I wanted to rip them out and just get white or not. So we decided that we could eventually do that someday, but that we wanted to go a little simpler on the remodeling from here on out. So we left the blue toilet and tub in. So ergo we had to have blue as one of our guest bath colors.
 |
| My good friend Aimee gave me this beatiful potted orchid...luckily it's fake..cuz I've got a black thumb! |
Remodeling a guest bathroom can be challenging...all those decisions to make. I decided to go with a beachy theme first. I got a light blue color of paint and painted the existing cabinetry this light blue. Then I went over the edges with sandpaper and made it look kind of distressed and "beachy". Well, I thought it would look really good, but I didn't like how it turned out. That happens sometimes in remodeling. You try it, you don't like it...you change it again.
 |
| Tiffany, my daughter and I painted moldings and glued onto existing mirror...Cool frame! |
 |
| I broke the lid off this cute jar...so I filled it with Q-tips! It worked like a charm! |
So the 2nd time around I painted the cabinetry black in an eggshell black finish. It looked 1000 times better than the sanded beachy blue (which kind of looked too messy or unfinished or something). Then I found the perfect shade of pale blue in Glidden that wouldn't clash with the toilet and tub on the walls and painted the whole room. Then we hired the contractors back to do tiling on the floors and we did a similar tile to the laundry room, just a tan, porcelain tile. Pretty basic. I think we got the tile for 68 cents each at Lowes. We had to travel to about 3 Lowes in the Salt Lake valley to get enough, but it was worth it to me. It was only like $60 bucks for all that tile, maybe less.
 |
| I thought this wire basket would be cute for towels, but John has ' taken it over as his bookshelf while he soaks in the jacuzzi tub! |
Then we had the granite installed over the black cabinets and the small hole cut for the vessel sinks and had them rip out both of the previous sinks. In this blue guest bathroom there had been 2 sinks, but we only replaced one sink, to make more counter space. Then we decided on a granite vessel sink. It was kind of expensive, I think $150 at Stone Depot, but hey, it is carved granite! I am glad I didn't go with glass vessels or porcelain sinks. And do you know why? I hate to clean very often, and that sink NEVER looks dirty. It's speckled with granite for heavens sake, so it looks perfect all the time. A tip from the Stone Depot owners. :) Thanks for the tip! I'm not sure I want to remodel a bathroom ever again either....
 |
| Granite counters and granite vessel sink...always looks clean! |
 |
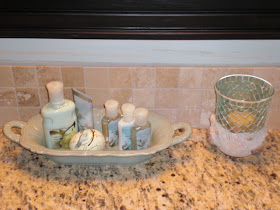
| Cute blue pottery bowl with handles from T.J. Maxx, love that store! |
Then we pounded in some skinny nails to the moldings just around the 4 edges to be sure it wouldn't fall off while it was drying. It turned out so pretty! I'm doing this to all my old bathroom mirrors eventually. What a cool face lift!
 |
| Finished remodel of the guest bathroom |
 |
| Here's the fake plant I arranged in a pretty pot....I kill anything living!! Blue ceramic pot from Joannes Crafts |
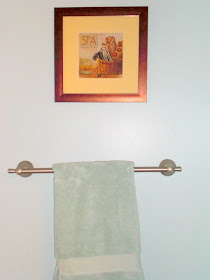
The last thing I did was matching the towels, the counter decorations, the rugs and shower curtain. I found a cute aqua sign that says "Relax" in wood lettering and put that up in the window with a new, white faux wood blind. And I found a cute little creme color wire rack to hold bubble baths, soaps and extra towels. I think I found that at Gardner Village Whites Shop. I loved that place so much, I was so sorry it went out of business.
 |
| Cute stuff here and there..in the guest bathroom remodel. |


No comments:
Post a Comment
It is so COOL that you are Commenting!